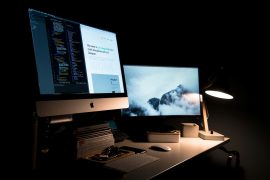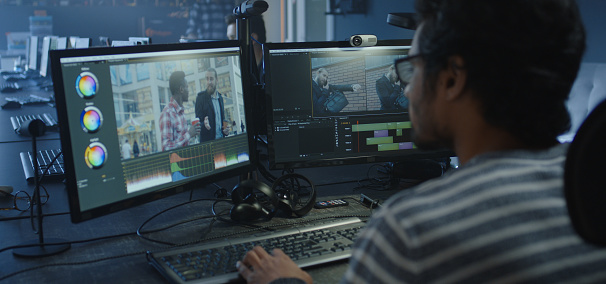
Once you’ve filmed some content, whether it’s for a youtube video or a large movie, it’s time for the next step in the process: editing. Just like shooting a video, editing requires ingenuity and technical know-how and a good video editor will be key in enhancing the entire process. In this article, we will be listing tips and tricks that will help you find your way around video editing and video editors.
1. Sorting your content
Before you even start your edit, it is important to have an idea in your head of what you want your finished product to look like. This will help you while collecting and sorting your material. This tip followed by both professionals and beginners alike will massively simplify the rest of your editing process by making clips and videos easier to locate, access, and move around. Grouping all of your footage in a folder on your PC will make finding content easier along with helping you form an image in your mind about the outcome you want.
The most successful methods for organizing video files are labels and folders. Sort and organize relevant items in your library into folders. Label your folders so that you can easily find individual videos.
Tags are yet another option. Include a list of keywords in your folder to help describe the clip’s content. You may also put titles in your video description so that if someone wants to discover a certain video, they can do so using the tag. The tags should be relevant, correct, and assist in establishing the video’s context.
The idea is for you and your team to be able to quickly scan the videos for information. Finally, decide on the ideal name and labelling system for you.
2. Keyboard Shortcuts will make things easier
The amount of time spent on the keyboard is one of the simplest ways to tell the difference between a skilled and an inexperienced video editor. Editors who have been in the business for a while understand that saving a little time here and there adds up over time.
As a result, if you want to save hours (if not days) on a project, you must learn how to use keyboard shortcuts. Fortunately, there are several resources for learning keyboard shortcuts.
One of the best methods to learn keyboard shortcuts is to simply print out a cheat sheet that you can readily refer to while editing. If you’re doing simple tasks like playback or trimming, and over time by referring to these cheat sheets you’ll get a hang of most shortcuts. We’ve given below a simple cheat sheet that can be followed by most video editors.
The Timeline:
- Pull-up keyboard shortcuts = Command+Option+K
- Zoom to Sequence = \
- Zoom in = Z
- Zoom out = Shift+Z
- Reverse play = J (Shuttle Left)
- Pause = K
Navigating the Timeline:
- Go to Previous Edit Point = A
- Go to Next Edit Point = S
- Go to Previous Edit Point on Any Track = Shift+A
- Go to Next Edit Point on Any Track = Shift+S
- Select Clip at Playhead = D
- Match Frame = F
Tools:
- Rolling Edit Tool = N
- Slip Tool = Y
- Razor Tool = C
- Selection Tool = V
Editing:
- Ripple Trim Previous Edit to Playhead = Q
- Ripple Trim Next Edit to Playhead = W
- Extend Previous Edit to Playhead = Shift+Q
Fine Tuning:
- Step Back 1 Frame = E
- Step Forward 1 Frame = R
- Step Back 10 Frames = Shift+E
- Step Forward 10 Frames = Shift+R
Changing Views:
- Toggle Full Screen = Control+`
- Toggle Multi-Cam View = Shift+0
- Toggle Workspaces = Option+Shift+Numbers
3. Good sound and music is crucial
Good sound is arguably more important for a project rather than any high-end film-grade camera you’re shooting with. A project can be enhanced with the right music and sound. Music can be acquired both for free and paid. But it is always preferred to pay for music if it fits well with your project.
You might believe that getting music from the internet for free might be the best choice, but there are reasons why that isn’t the case. Pirating copyrighted music could be illegal and royalty-free music isn’t always high quality or suitable for most projects. So utilizing paid music is the recommended way to go, but royalty-free music isn’t a bad choice.
You might be reluctant to pay money for a song you won’t use, but that’s not how music licensing works nowadays. You can download free watermarked audio previews from websites and incorporate them into your timeline and check if it fits your project. This way, you avoid squandering money on a mediocre track.
Just as editing clips had their cheat sheet, we’ve given below a sound cheat sheet that you can work around to achieve a sound that may succeed for you. It’s important to keep in mind that every editor has a different understanding of what the ideal audio level should be, so this cheat sheet should be loosely followed for the best results.
- Overall Mix Level: -10db to -14db
- Music: -18db to -22db
- Dialogue: -12db to -15db
- Sound Effects: -10db to -20db
At the end of the day, you must be the final decider. Your audio may stick to these guidelines flawlessly, but if it sounds horrible, changes need to be made.
Bottom Line
After a long duration of working on the same project, editors may become tired of the material. By taking a break and returning with fresh eyes, you can help retain your audience’s perspective.
At first, video editing may appear to be a difficult endeavour, but with plenty of experience and these suggestions, you’ll soon be able to edit videos rapidly, regardless of the video editor you’re using. With some practice, you’ll be able to edit a short video in an hour or two. However, bear in mind that excellent things take time, so producing a high-quality film will require more time and work.